SHTFDad may collect a share of sales or other compensation from the links on this page.
The difference between a well-packed backpack and a poorly packed one can be huge, particularly if you’re heading on a longer backpacking trip or carrying an especially heavy load.
While many hikers measure their packing success by their ability to fit every item in and close the buckles, packing a backpacks involves much more subtlety and skill.
Not everything is as it seems. In fact, dedicating some time to learning the proper packing techniques can significantly enhance both safety and comfort, yielding great rewards.
To that end, we’ve compiled a list of the five simple steps below to help you pack like a pro.
5 Steps to Effectively Pack a Backpack
1. Choose Your Backpack Carefully

Choosing the right size and type of backpack is crucial to packing it effectively.
A pack that is too small or narrow may force us to strap items to the pack’s exterior or squeeze them in a way that doesn’t optimize balance.
Gear items will shift around in packs too big for our gear while we’re moving, which is a pain in the posterior and makes it harder to find things when needed.
It can throw us off balance and/or cause uncomfortable gear items to poke us in the back until we stop and do some rearranging.
The gear requirements (and, hence, the size of your load) will vary from person to person and weather conditions.
Refer to the following list for a general, ball-park guide to the backpack capacities required for different travel durations:
- 20–30 Liters: Day hikes or single overnight trips
- 30–60 Liters: 2-4 nights
- 60+ Liters: Multi-day trips
2. Lay Out Your Load
Before you start loading your pack, we highly recommend setting aside some floor space and laying out every item of kit you plan on taking with you the day or night before you set off.
This approach will serve three purposes: First, it’s easier to check that you have everything you need for your trip.
Secondly, it will help you identify any items you maybe don’t need; thirdly, it will make categorizing your gear for “zonal packing” much easier.
3. Top, Middle, and Bottom

Viewing your backpack as being comprised of three zones—the top, middle, and bottom—can greatly facilitate the packing process.
Using a zonal system will not only help ensure your load is better balanced, but it will also help you save time hunting for things in your pack, allowing you to separate wet gear from dry gear, sharps from softs, and breakables from non-breakables.
Here’s a zone-by-zone guide to show you how to do it:
Bottom
The bottom zone, as the most inaccessible part of your pack, is ideal for all the gear you won’t need until reaching your camping location at the end of the day, such as tarps, tents, and spare clothing for wearing around camp.
Given that the base of your pack is often a “hotspot” for chafing due to the friction between your skin and the pack’s fabric, it’s also wise to stuff in any soft, bulky items like sleeping bags, tent slippers, or sleeping pads to make the surface of the pack as flat as possible.
Middle
Your pack reserves this zone for these items:
- Items that aren’t camping or sleeping gear, which you’ll only use at the end of a day’s hiking
- Items that aren’t ones you will need to access frequently and, as such, are better stored in the pack’s uppermost portions or in the hood.
- Items that are slightly heavier than those in the top section of your pack help distribute the weight and stabilize your center of gravity.
Some examples are bulkier items like down jackets, crampons, overnight food supplies, a cooking kit, a stove, and gas canisters or fuel bottles.
Top
You should reserve the top of your pack for the gear items you’re most likely to need to access quickly or frequently while out on the trail.
While this may depend to a certain extent on your own method of operation in the outdoors and other factors such as the weather conditions, in most cases this will mean gear items like your rain jacket, gloves, hat, water bottle, sunscreen, map, and compass, or maybe even a via ferrata kit if you have only a short walk before hitting the cables
However, the best way to decide what to store in this section is to simply anticipate which items you’ll need to have close at hand so you don’t have to disturb the rest of your kit to find them.
4. Compartmentalization and Organization
Within your backpack’s zones, you can further organize your gear by purchasing a variety of colored stuff sacks to stow individual items.
This will not only help you to locate gear more easily when needed—that is, you can remember which gear is in which sack!
It will also protect your gear from any sources of wear and tear inside the pack and keep it dry (if you buy the waterproof variety).
5. It’s All About Balance

In addition to the zonal packing strategy mentioned above, the way in which you use your pack’s loops, straps, and pockets and fill in the gaps in its storage can play an important part in the pack’s overall balance and comfort.
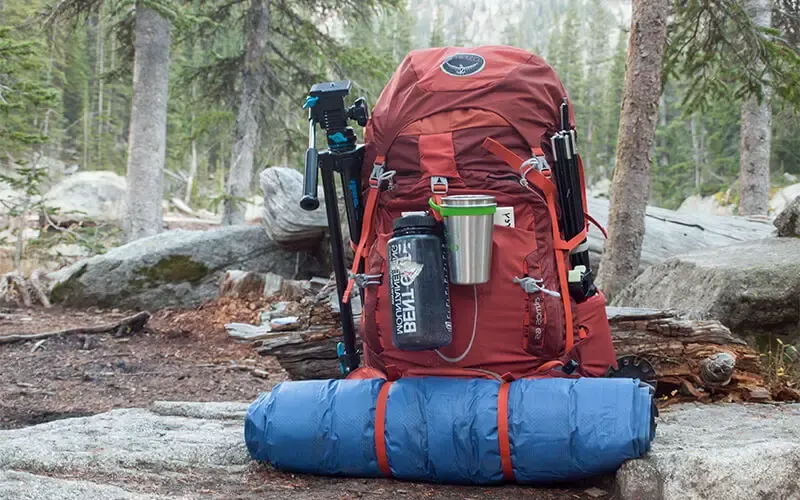
- Gear loops: While these can come in very handy for securing bulky items on the exterior of your pack, it’s worth bearing in mind that things stowed in loops can easily snare in overhanging branches or on rocks and also throw you off balance—not ideal if you happen to be negotiating a particularly airy section of trail!
- If you have to stow any gear outside of your pack, we’d recommend first stashing it in a stuff sack (if possible) to reduce the risk of snagging, cinching it down as tightly as possible, and trying to balance things out by stowing items on both sides of the pack.
- Compression straps: Many hikers often overlook or simply disregard the compression straps on backpacks, but they are a very handy means of consolidating and stabilizing your pack’s load to improve balance and stop gear shifting around inside, particularly if you happen to be using a pack with a higher capacity than is required for the gear you are carrying.
- Gaps: When you’re loading your pack, try to fill any unused space between your gear by compressing each individual item as much as possible. Again, this stabilizes your load and prevents gear shifting while moving.
- Bits and Bobs: For all that stuff that you want to have close to hand but don’t want to have poking you in the thighs through your pants’ pockets—maps, compasses, snacks, GPS devices, sunglasses, etc.—the ideal place for storage is the accessory pockets or webbing pockets on the top of your pack, the hipbelt, and/or on either side of the central well. Again, trying to spread the weight between the pockets will help to keep your load more balanced.
Wrap-Up
Sometimes the simplest little changes in habits can make the biggest difference.
Following the above advice and packing your backpack to improve its overall balance and organization will make your time on the trails much more comfortable and convenient, and it will significantly reduce the time you spend looking for AWOL gear items.
