SHTFDad may collect a share of sales or other compensation from the links on this page.
How to start an IV is a valuable skill to have in your first aid arsenal and you may potentially save someone’s life. It can be used as a route for delivering medication or drawing blood.
However, it takes a little practice to get the hang of it. But once you can do it it’s usually not a difficult process.
Here is a list of the supplies to prepare before starting an IV:
- Tourniquet
- Clean cotton ball, pad, or a clean cloth in a pinch
- Rubbing alcohol
- A needle that is capable of hooking up to tubing or directly to a syringe
- Tubing to hook up to a syringe
- Syringe of saline
Tips For Starting an IV
Selecting the IV Site
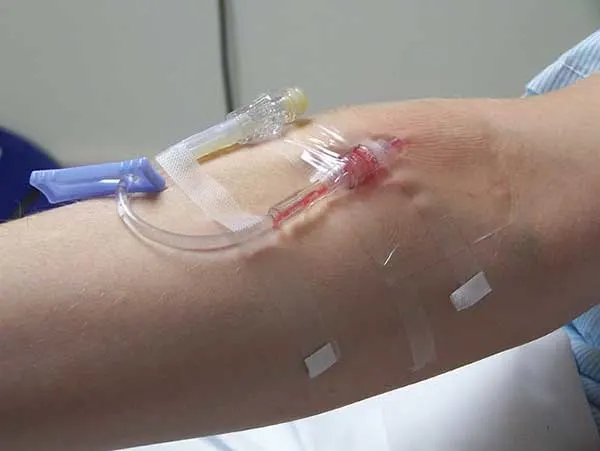
To start your IV, first select your site. I prefer to start the IV on the inside of the patient’s elbow (this area is referred to as antecubital in medical terminology) if it’s going to be used short term.
This area is advantageous because the vessels are larger and generally easier to find. You also don’t have to worry about extravasation as much as you would with a smaller vein.
Extravasation is when fluid is leaked from the vessel into the surrounding tissues. It can be extremely painful for the patient and potentially harmful.
However, an antecubital IV has its disadvantages. First, it’s an area of the body that frequently gets bent, hence my recommendation of using this as a short-term site.
It also has its limitations in case of extravasation. If this occurs when you are starting an IV on a patient, it is time to select another site.
It’s crucial to keep in mind that you move “upstream” in the vein, meaning starting a new IV closer to the trunk of the body than before. Starting an IV on the back of the hand is my preferred method if it will be in place for long-term care.
Vessels on the hand are generally easy to find and the IV won’t get bent there. However, even though the veins are small, they do have a tendency to roll, so be sure to anchor them with your fingers when starting the IV.
Also, since the skin on the back of the hand is thicker than inside the elbow, it may be more painful for the patient to have it started there. Finally, there is a higher risk of extravasation due to the vessels’ small size.
Once you’ve selected where the IV is going to be started, it’s time to apply the tourniquet. Tie the tourniquet snugly just above the preferred site and have the patient open and close their hand into a fist several times.
Clean the IV Site
Next, it’s time to clean the IV site by soaking your cotton or cloth with alcohol and wiping the skin with it. Allow the alcohol to air dry completely and be sure not to blow on it so as not to introduce more germs to the area.
Inserting the Needle
Now gently feel for the vessel under the skin if it’s not readily visible. Veins feel almost spongy and springy when palpated. After you find your target, vigorously pat the area a few times.
Anchor the vessel with a finger above and a finger below the selected site and insert the needle at a thirty to forty-five-degree angle. Clamp down on the vein just above your needle and remove the tourniquet.
If you are using a needle housed in a tiny plastic catheter, withdraw the needle, keeping the catheter in place, and attach your tubing or syringe. If not, just attach the tubing or syringe directly to your needle.
Once the attachment is made, it’s time to check your IV.
Attach your saline syringe to the tubing or needle and slowly draw the plunger back. You should see some of the patient’s blood come into the syringe. Next, gently push the plunger down the tube of the syringe to inject the saline; the saline should flow easily into the vein.
Be careful not to push too hard because you could “blow” the vessel causing extravasation.
And, if you’re met with great resistance, remove your needle and try a new site. Once you’ve completed your saline check and the IV is properly functioning, continue to use it as desired.
Removing the IV
When it’s time to remove the IV, I recommend placing a cotton ball or bandage over the site first and then slowly withdrawing the needle or catheter.
Quickly apply pressure to the area and continue to hold it until the bleeding has stopped. Finally, you can apply the bandage and pat yourself on the back for doing a good job.
Helpful Hints
- If you have advance notice that you’ll be starting an IV, have the patient drink plenty of water and avoid caffeine. Veins are easier to find and more cooperative in a well-hydrated person.
- If possible, wash your hands before starting an IV and wear disposable gloves if they are available.
- I like to have my syringe attached to my tubing prior to starting the IV, if possible. This can save a lot of blood loss and speed up the process.
Resources:

